How to create a Virtual Tour
Etiam id quam maximus, tempus justo at posuere est! Aenean urna urna, semper sed consectetur sit amet, pretium eu ante. Nulla et consectetur ligula, ut fringilla velit. Interdum et malesuada fames ac ante ipsum primis in faucibus. Aenean urna urna, semper sed consectetur sit amet, pretium eu ante. Nulla et consectetur ligula, ut fringilla velit. Interdum et malesuada fames ac ante ipsum primis in faucibus. Nulla sagittis vel ante sit amet tempor. In sit amet neque non tellus interdum tincidunt eget eu odio. Donec quis diam felis. Etiam id quam maximus, tempus justo at posuere est!
1. How to create a Virtual Tour
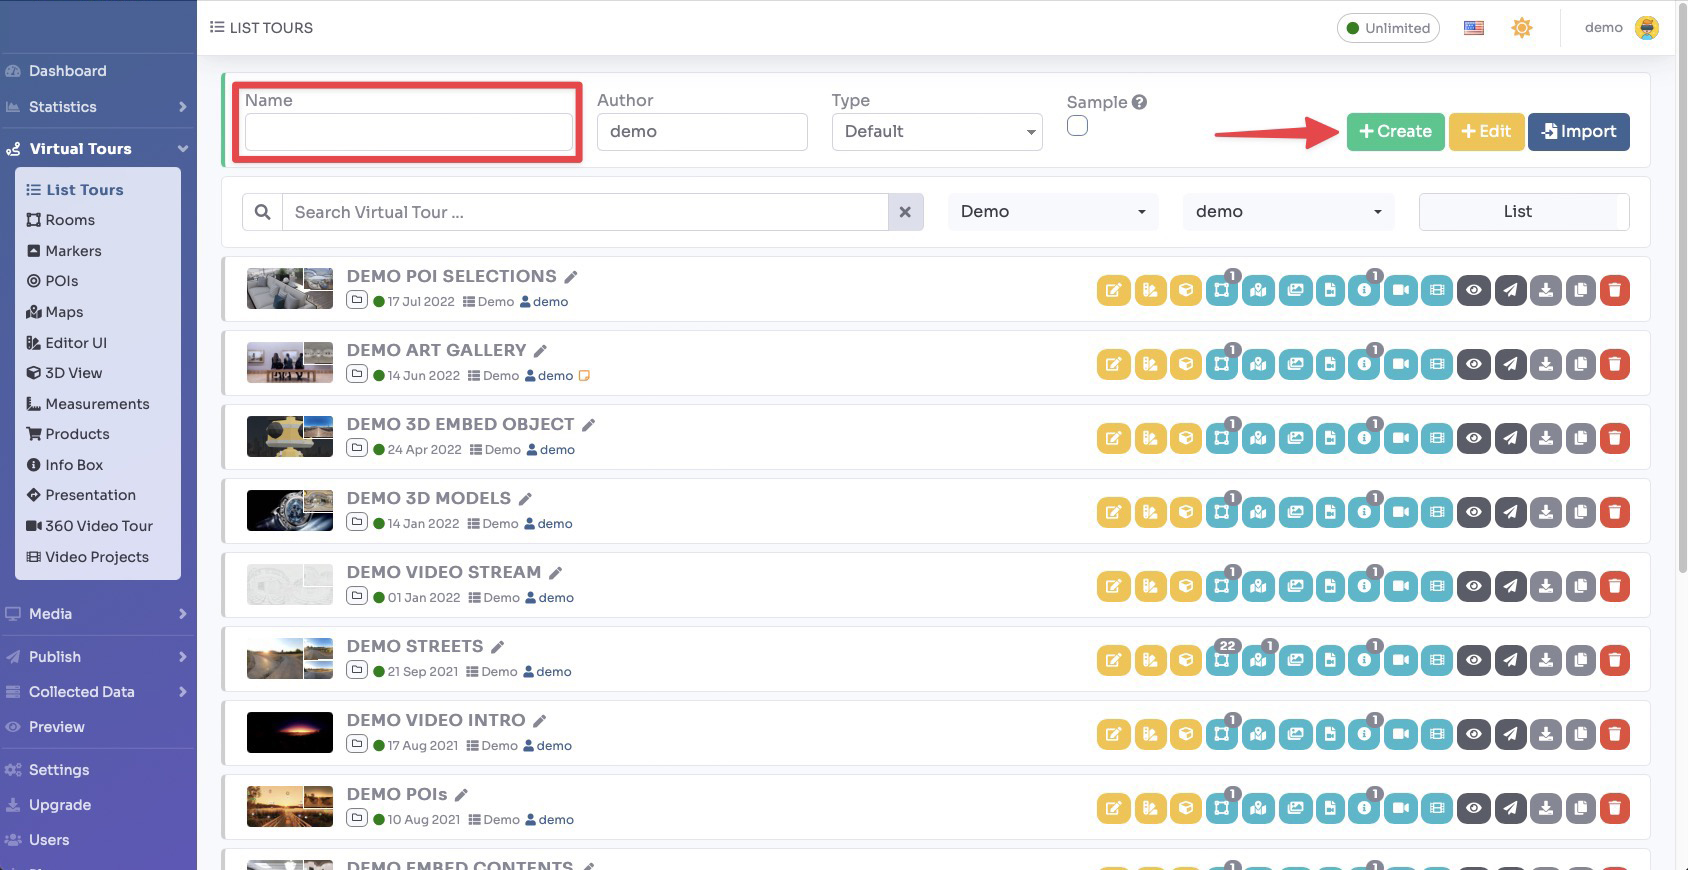
Select Virtual Tours > Lists Tours from the side menu.
At the top of the screen, enter the following information:
- In the Name field, enter the name of the new tour.
- The Author field is filled in by default with the user’s name, but you can also change it as needed.
- If the Sample checkbox is selected, the created tour will contain sample data.
Confirm the operation by clicking the “+ Create” button.
The newly added tour will appear on the list of your tours.
You can change its name at any time by clicking pencil icon beside it.
On the right side, a list of all functionalities related to editing, managing, and sharing the virtual tour will be displayed.
2. How to add a Room (Panorama) into the Tour
Select Virtual Tours -> Rooms from the side menu.
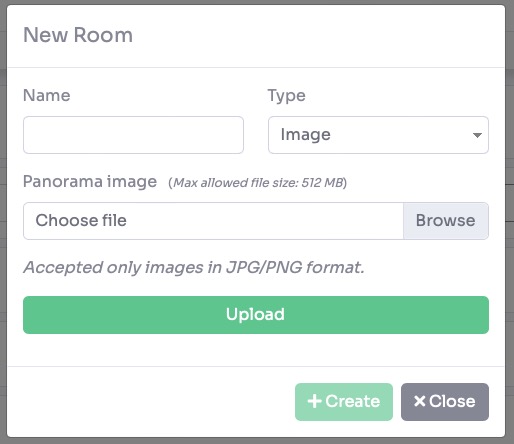
Click on the “+” icon on top right.

A new pop-up appear with the information you need to fill to create the new room:
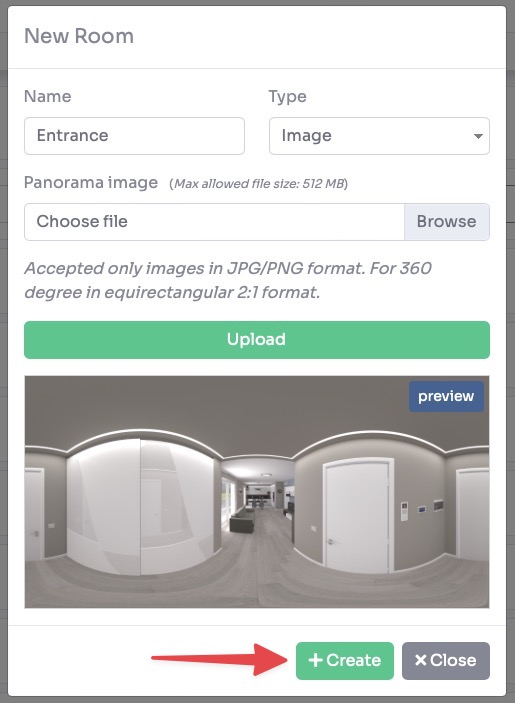
- In the Name field, enter the name that represent your Room (for example Kitchen)
- You can select 5 Type of Room, which represent the content of it:
- Image, the image of a panorama in jpg or png format (for a 360 panorama use an image with 2:1 resolution ratio)
- A.I. Panorama, with this tool you can describe what kind of room you want and AI will generate it for you
- Video 360, a 360-degree video in mp4 or webm format with 2:1 resolution
- Video Stream (HLS), a link to your live stream video
- Lottie, a Lottie animation file in Json format
Let’s continue with the default one, the image.
- Panorama image, click Browse and select the panorama image from your disk.
Click Upload to start the upload.
When the upload ends, a preview of the room is shown.
To confirm and create the room click on the ‘+ Create’ button.
Once created you will be redirected to its settings page, where you can change the display parameters.
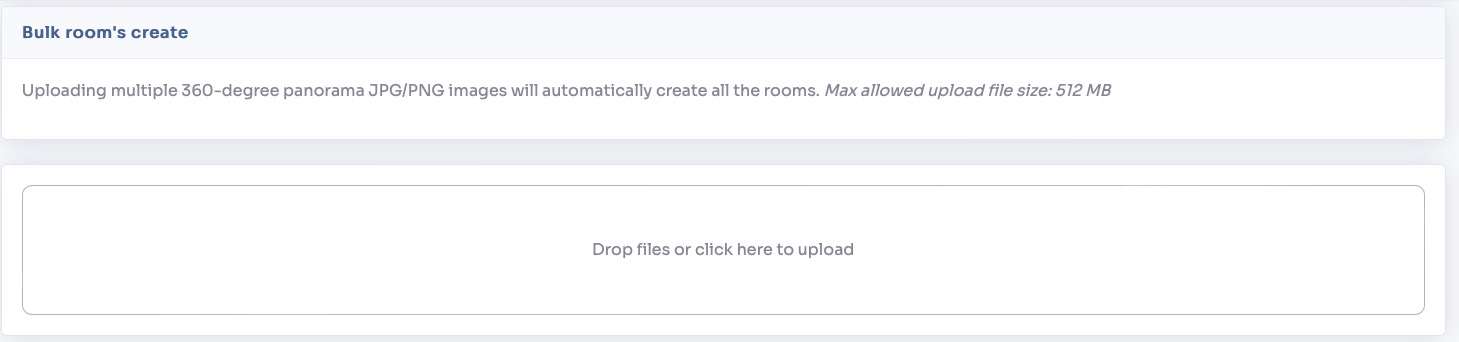
To speed up the process, you can use the bulk room creation feature BULK.
In this mode you can only upload .jpg/.png files by drag and drop them from your computer folder.
The system generates automatically all the rooms with the name of the files.
It’s not yet a fully functional virtual tour, you need connections between rooms.